Applying eye shadow flawlessly is one of the most difficult tasks, particularly for women on the go. Every day, a lot of makeup tutorials show up on our social media feeds. Even while they all go into great depth about the products and colors they favor, the eye-favor application is usually rushed through or left out altogether.
It’s safe to assume that everyone knows the basics of applying eyeshadow. Wrong! Although it is one of the most normal parts of any beauty process, applying eyeshadow is frequently dismissed as unnecessary or too simple. But if you’re a beginner and want to know how to apply eye shadow,
If you’ve ever had your makeup done professionally, you know that the right eyeshadow can completely transform your appearance. But if you don’t wear makeup very often, the number of eyeshadow palettes and brushes can be too much to handle. Thankfully, you won’t need to binge-watch videos on YouTube for hours on end to accomplish this. This article will walk you through the simple tricks for applying eye shadow quickly and easily.
No matter what color your eyes are—blue, brown, or green—a little makeup may make them stand out. But working with unprocessed dyes can be scary (maybe the scariest thing to do, right after eyeliner). Skillful swiping is required to avoid seeming like you rummaged into a child’s castoff.
First, an Important Note:
There is no single, definitive method for applying eyeshadow correctly. Makeup is liberating since you don’t have to follow any specific guidelines. That being said, we’ll go over some of the basics in a minute.
However, let’s start with how to choose the proper eyeshadow. Matte eyeshadows are great for beginners since they hide imperfections and look good on all skin tones. Makeup artists recommend using loose powder eyeshadows for a dramatic or festive effect.
Need something quick but durable? One stroke of a liquid shadow is all it takes to achieve the most color payoff, and it won’t budge until it’s dry. Finally, metallic eyeshadows are a great option for those who want a shimmery look without the excess glitter.
At the outset, the most essential thing Pick out an eye shadow.
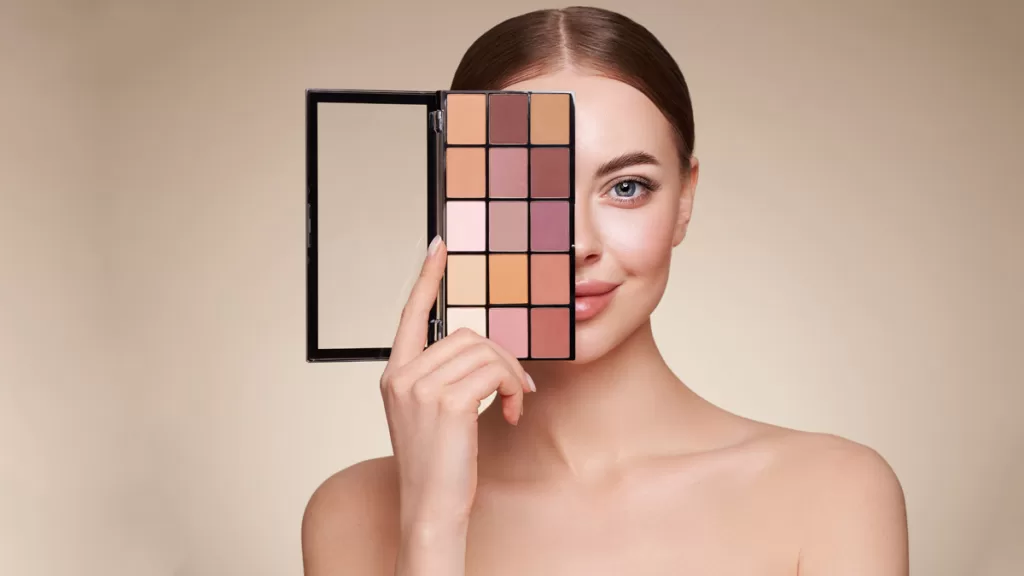
With so many brands, colors, and finishes to choose from, it’s easy to feel overwhelmed while shopping for eyeshadow at a specialty store. However, don’t let the wide variety put you off; instead, welcome it with open arms. There are so many different options available that it’s easy to find the perfect eyeshadow for you. Eye shadows are available in a wide range of shades and textures, including loose powder, compact powder, and cream.
Loose powder eyeshadows are the most intensely pigmented, yet they can be difficult to work with due to their powdery consistency. Simpler to apply than powder shadows, cream shadows crease more quickly. If you’re just getting started with applying eyeshadow, a compact powder is a way to go. It is possible to increase the intensity of eyeshadow at any time.
To be an eyeshadow artist, you don’t need dozens of colors, but having at least three tones that complement each other is a good start. Several different eyeshadow tones are needed to achieve various appearances.
To avoid looking overly made up, use three neutral-toned eyeshadows, such as browns or grays. Except for that, feel free to pick whichever colors strike your fancy.
Master the art of smudging eye shadow
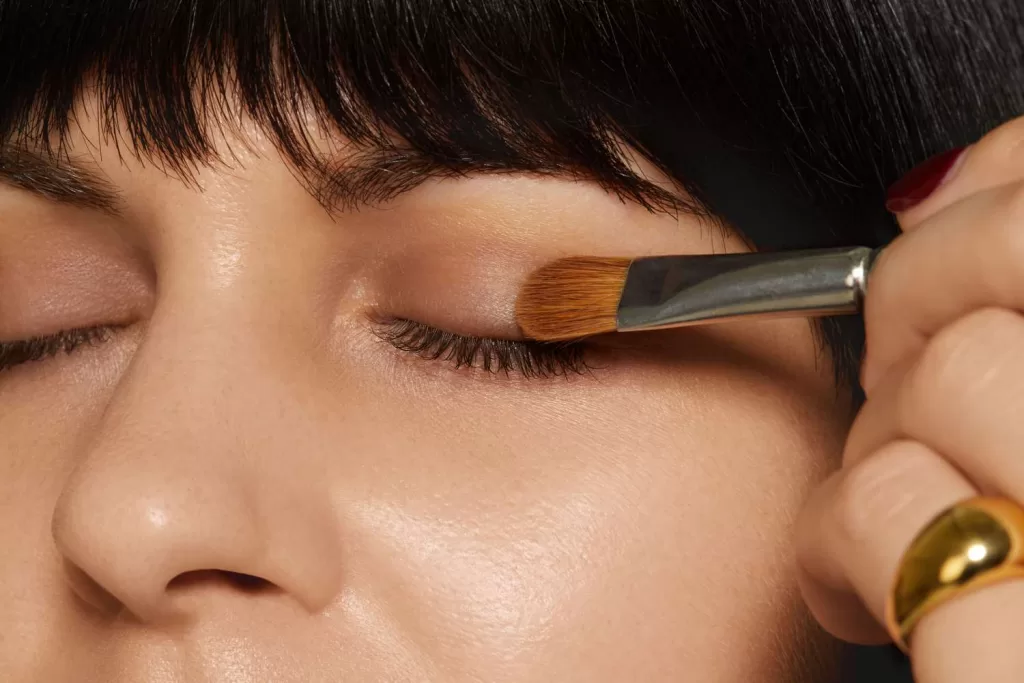
Utilizing the appropriate brush strokes and application speed is crucial when applying eyeshadow. Avoid a sloppy, ugly eyeshadow application by taking your time and utilizing the right brush and application technique. Do not sweep the eyeshadow across your lid; instead, dab it on. This ensures that it stays on your lid and looks even rather than splotchy.
Use little, deliberate brush strokes in the same direction to blend colors instead of a quick, sweeping motion while applying eyeshadow. Applying eyeshadow is a delicate process that requires slow, deliberate movements of the hand.
Never bring your makeup up to your eyebrows unless you are using a highlighter shade. This is a proven technique for making your eyes look too dramatic and artificial.
Now that we’ve got things figured out, we can get started with the procedure.
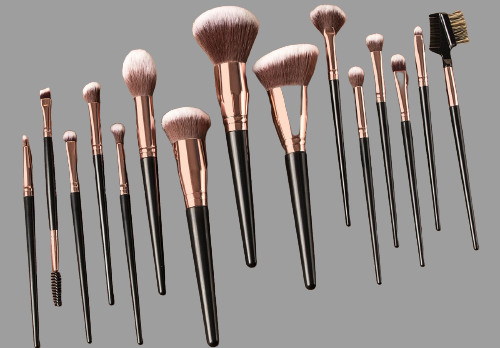
1. Have a good supply of basic brushes on hand.
If you’re just getting started with eye makeup, there are a few basic brushes you should have on hand. It is important to use the proper paintbrushes. Eyeshadow can be put on with your fingers, but they are usually too big and slick with natural oils to be easy to use.
Purchase some high-quality makeup brushes for the smoothest, most appealing application of eyeshadow. Sponge brushes are not ideal for applying eyeshadow, so don’t bother with them. Complete your eye look by applying eyeshadow all over your lid with the help of a flat, stiff brush. You can use this brush to gather up a lot of colors and spread them evenly across your entire eyelid.
A soft or hard dome brush can be used to apply and blend eyeshadow in the crease. These are essential if you want your eyeshadow to blend seamlessly from your lash line to your brow bone.
To apply shadow close to the lash line, grab a thin pencil brush. You may use these on your upper and lower lash lines, as well as in those hard-to-reach places like the inner corners of your eyes because of how small and thin they are.
Ideally, you’d use an eyeshadow brush with a large dome, like the Rare Beauty Stay Vulnerable All-Over Eyeshadow Brush, to apply color all over your lid. You can pick up a lot of stuff and cram it onto the lid with the help of the short, dense bristles.
The Precision Blending Eyeshadow Brush from Fenty Beauty is a great way to apply and blend shadow in the crease. Keep a couple of blending brushes on hand; an angled one is especially useful for getting into tight spaces like the inner and outer corners of your eyes.
2. To prepare your eyelids, use a primer.
Priming your eyes is a must since it helps your eyeshadow stay all day, much like priming your face does for your foundation. If you skip this step, you may find that your eyeshadow shifts across your eyelids as a result of sweat, grease, or rubbing. Get a pea-sized amount onto your ring finger (it has the lightest touch) and massage it into your entire eyelid. The brow bone (the area just behind the eyebrow) and the inner corner of the eye (near the tear duct) are also prone to oil buildup and should be attended to.
Put on your regular makeup. The order of operations for makeup application suggests that eye makeup be done last; therefore, apply foundation, concealer, and powder before moving on to the eyes. The eyeshadow should be the last step of your makeup routine after you have applied concealer, foundation, blush or bronzer, and brow pencil.
If you want your eyeshadow to last all day, use a primer first. If you don’t, after a few hours of wearing the shadow, the oils your skin produces will seep through it and cause it to cluster along your crease.
Mascara should always be applied last, after eyeshadow, unless you’re creating a smoky eye, in which case eyeliner should also be applied last.
Use the palest shade you have. This is a creamy, neutral color of eyeshadow that is commonly used as a highlighter. Use a stiff, flat brush to apply this to the inside corners of your eyes. Move the brush up and down to pick up a small amount along the upper and lower lash lines. Use a small, feathery brush to apply some just below your brows.
Put it in a moderate shade. Choose the color in your palette that is halfway between your lightest and darkest options. Pat this color all over your lid, from your lash line to your crease, using your flat brush. Stay away from the area just above your crease and the outer corner of your eye.
The eyelid is the perfect place to use your darkest shade for contouring. Contour your eyelid with your darkest makeup shade and a dome brush. Apply the shadow by sweeping the brush in a half-moon motion from the outer corner of your eye up and in towards the crease. Use the deepest line of shadow at the base of your lashes and gradually lighten it up. If you want an angled fan effect, draw the shadow a little higher on the eyebrow.
Make your eyeshadow look more natural by blending it. Dome brushes should be cleaned using an antibacterial brush cleaner or soap and water, then dried with a clean towel to prevent the spread of bacteria. Blend the eyeshadow’s edges into your skin tone with your clean brush, and blend the three hues together along your eyelid. You can mix the shadows better if you use broad, gentle brushstrokes.
3. Use an eye shadow primer on your eyelids
To apply eye shadow, use a brush (or your fingers, in the case of liquid formulas) to spread the color evenly over the entire lid. Blend and buff the line gently so that most of the product is on the lid and only a small amount is inside, near the inner corner. You can take this base color all the way to your brow bone for a dramatic, nighttime look, or stop at the crease of your eye for a natural, daytime one.
The inner corners of your eyes and the space right behind your eyebrows are ideal spots to apply your lightest eyeshadow color with a firm, flat brush. Doing so will draw attention to the features of your face that make your eyes stand out.
Apply a medium-toned sunscreen. Apply your middle shade with a flat, stiff brush all along your eyelid. Working from the lower lash line up to the crease is a good place to begin. Don’t bring it up to the level of your highlighter, though.
Add some smoke to the scene. You should start by applying your deepest shade along your upper lash line using your domed brush. Color should be applied to the lower one-third of the eyelid only. Apply a second, darker, more precise line of color along your lash line with your pencil brush.
Make sure to follow your natural lash line all the way down. Use a pencil brush to put some of your darkest eye shadows on the lower lash line. Lighten the corner of your eye closest to the tear duct by starting at the outer corner and working your way in.
Attempt a blending of your shadows. After giving it a thorough cleaning, use the dome brush to smudge your shadows together. To achieve a seamless color transition, gently blend your darkest shadow into your medium shade. Do not mix too much, as the line of black shadow along your lash line will become too soft.
4. Make the crease darker by applying a matte, deep shade
You can make your eyes look bigger and more expressive by applying a darker shadow (such as chocolate brown) to the crease (the area where your eyelid meets your eye socket). Sweep the deeper shadow across the rounded blending brush, tap off any excess, and apply it to the crease where the bone meets the lid.
To get a smooth transition between your lid and your contour, brush back and forth several times in a half-moon shape. (Important: don’t make the inside of your eyelids black, as this can make your eyes look smaller.) Add extra shadows to the mix to make the colors pop.
If your eyelids are deep-set or hooded, apply the crease shade above the real eyelid, on the lower brow bone, for the best effect.
5. Highlight your face by using a lighter hue in the inner corners and on your brow bone
Aching eyes? It’s possible to make tired eyes look more alert by using a light makeup hue as a highlighter. If you want to seem more understated, choose an eyeshadow in a matte bone tone; if you want to amp up the drama, try an ivory shadow with glitter. Use the angled blending brush to add some color to the inner corners of the eyelid and the brow bone (right above the crease).
In case you were planning on looking casual during the day, you may now stop. Get to the next section if you want a smokier eye.
6. use an angled eyeliner brush for best Eye Shadow effect
To make your lash lines stand out, use an angled eyeliner brush and dark eyeshadow. You can pick up color from a dark powder eyeshadow by sweeping an angled eyeliner brush over it. Brushes can be wetted to create a thinner, more precise line. Next, apply color by dragging the brush down the upper (where your lashes begin) and lower (where your waterline is) lash lines. To create a winged liner effect, you can either stop short of the lash line or extend the line outside.
Disclaimer: The author’s views are his or her own. The facts and opinions in the article have been taken from various articles and commentaries available in the online media and Eastside Writers does do not take any responsibility or obligation for them.
Note: Contact our Writers at www.eastsidewriters.com for writing Blogs/Articles on any niche. We have experts in various domains from Technology to Finance and from Spirituality to Lifestyle and Entertainment.