Your dream of transforming your stubborn curly hair into a curly to straight hair is easily attainable. Straight, smooth hair makes quite a statement, and it’s entirely possible to achieve this look with a little bit of effort (and a lot of patience!). You may go from having curly hair to smooth hair in a matter of minutes, but it all depends on how tight your curls are.
Straightening or curling your hair is your best bet if you want to make a significant difference in your appearance and catch your loved ones and acquaintances by surprise (depending on your hair type). However, the process of straightening your naturally curly hair can be labor last time-consuming.
Others choose not to even take the chance of straightening their hair at all, despite the fact that many people do so with some trepidation since they are afraid of doing damage to their tresses. However, if you make use of the appropriate tools, strategies, and procedures, you will be able to put these worries to rest.
When you want to straighten your strands, you need to exercise extreme caution because curly hair tends to be dry and breakable on its own. It’s a tricky method that requires a lot of heat-protecting materials, but if you follow the steps carefully, you may make your sleek style endure for several days!

Let us get started
In the following passage, you will learn about several of the most effective methods for straightening your hair without causing damage to them, as well as what keratin straightening treatment is and a few crucial considerations to keep in mind.
Before you make the transition from curly to straight hair, you should educate yourself on the many reasons why curly hair is more likely to frizz than straight hair, so it needs a gentle shampoo and a deep conditioner to keep it healthy and free of damage and frizz, whether it is curly, wavy, or straightened hair that is coily. Learn how to properly straighten your curly hair without causing any damage by following this step-by-step instruction. Here are the steps:
The Straightening Process for Curly Hair
1. Untangle and straighten out your knotted and tangled hair.
Because curly hair can lose its moisture and become dry quickly, it can be harder to keep it in place and less likely to get tangled. Before you attempt to straighten your curly hair, you should always detangle it with a comb that has wide teeth first. Because, after all, you want your tresses to have the silkiest appearance imaginable.
Comb your hair carefully with the wide-toothed comb, beginning at the ends and working your way up to the roots, starting at the back of your head and going forward. It detangles your hair more quickly and effectively without causing damage to it. Continue doing this until your hair is devoid of tangles.
Note: Before you get in the shower, you should always comb through your hair. When you wash your hair, your strands won’t become tangled as easily if you do this first. In addition, you should avoid brushing your hair when it is wet because doing so makes it more prone to breakage.
2. Use a shampoo recommended for straightening curly hair.
In order to successfully straighten your curls, you must first remove any buildup or residue from styling products that may be in your hair. Make sure to reduce the frizz in your hair and get it ready to be straightened by using a shampoo designed specifically for straightening hair.
Curly hair is more likely to frizz than straight hair, so it needs a gentle shampoo to keep it healthy and free of damage and frizz. In order to get your hair ready for the straightening procedure, you should first wash it with lukewarm water and a shampoo and conditioner that are designed to reduce or eliminate frizz.
When you rinse your hair, you should always use lukewarm water rather than hot water since hot water can remove all of the moisture and natural oils from your hair. It is recommended that you take care of your hair using products that are kind to your strands and can help protect them from the harm that can be caused by straightening appliances.
3. To fortify your strands, work a leave-in conditioner through your hair.
After you get out of the shower, use a generous amount of leave-in conditioner on your curly hair. This will help to seal in moisture, prevent breakage and split ends, and protect against damage caused by heat styling.
In order to have the best effect, apply conditioner to the lengths and ends of your hair using only a pea-sized amount. While you’re drying off, wear a t-shirt or a towel made of microfiber to avoid scratching your skin.
4: Be certain that your hair is totally dry.

If you have the time, it is best to let your hair air dry fully rather than subjecting it to more heat or friction than is necessary. If you need your hair to be dry in a hurry, you should try drying it with a diffuser, which will spread out the heat and lessen the amount of friction. While your hair is drying, give it a light brushing to help untangle the strands and coax them into a straighter position.
Never try to use a flat iron on wet or damp hair! Wet hair cannot be flat ironed effectively, and doing so may cause additional harm to the fragile strands of your hair.
After your hair is completely dry, divide it into smaller sections to allow you to control the flat-ironing process. Working your way up from the bottom layers of hair is the most effective method for doing this task. Begin by working on the underside of your mane while pinning up the top two-thirds of it.
5. Get your locks ready to be straightened.
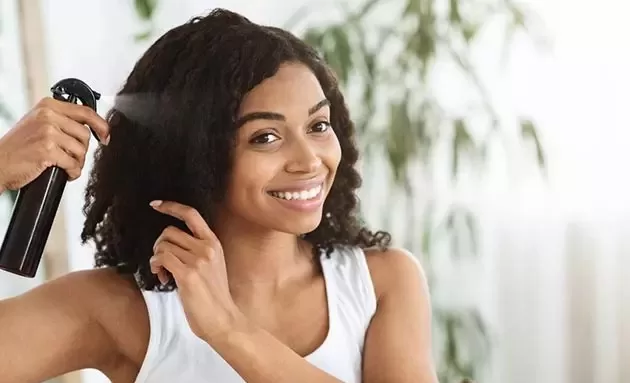
In order to straighten wet, curly hair, you have to do a few things. One of them is to make sure your hair is ready to use a blow dryer. Use a heat protectant on your hair before you use a blow dryer to protect it from the heat. Your hair will be protected from the harmful effects of heat styling. It protects against heat up to 450 degrees, locks in shine, and tames frizz at the same time.
Keep in mind, however, that using an excessive amount of heat protectant can cause your hair to become brittle and sticky. Spray evenly from a distance of 15 centimeters, and then wait until your hair is dry to style it.
6. Dry small sections at a time.
It may take you longer to dry your hair using a blow dryer if you have particularly thick, curly hair. Take out your hair dryer and a round-bristled brush, and then section off your hair so you can concentrate on drying each section individually.
While you are blow-drying the part, give it a light brushing. Use the dryer’s lowest heat setting to reduce how much heat your hair is exposed to while you blow dry it. Also, before moving on to the next step, check to see that your hair is totally dry before continuing.
7. Begin straightening.
Starting from the layer of hair that is closest to the scalp, grab a tiny portion of hair, pull it taut, and start pulling it through your straightener from the roots up. Working with small enough pieces will let you finish the flat ironing process in just two passes.
After you have finished straightening the layer of hair at the bottom of your head, unpin the rest of your hair and move on to the next part. Continue doing this step until each strand is glossy and smooth. Use a flat iron with long plates to quickly smooth out frizz and achieve the finest possible results when straightening your hair.
A useful piece of advice is that the ends of your hair are typically the most fragile and prone to breakage. The ends are also thinner, which means that less heat is needed to make them straight. Stop straightening your hair in parts at the mid-shaft when you want to help protect your strands from the damage that can be caused by excessive heat. Then, right before you finish, gather all of your hair into a ponytail and smooth the ends together into a straight line.
When straightening natural hair, one of the easiest mistakes you can make is to use a hot tool that does not have a dial to alter the temperature. This is one of the most common blunders. Due to the fact that everyone’s hair is different, a universal temperature might be perfect for the curls of another person’s hair, but it might be either too high or too low for yours.
Look for a straightener designed specifically for curly hair that has many heat settings. Remember that you should only run the heating tool through your hair once or twice before moving on to the next section. This will assist in reducing the amount of damage that the heat does to your strands.
8. Employ the chase approach.
If your straightener can’t give you locks that are poker straight, you will need to use the chasing method. It will provide you with the outcomes that you have been looking for all along. In order to successfully straighten your hair using this method, you will need to use both a rat-tail comb and a straightener at the same time.
It tries to reach every single hair strand while keeping the amount of heat it uses to a minimum. Using this method of straightening your hair, you should only need one pass to achieve a smooth surface over your entire head.
The rat-tail comb should be positioned an inch or two below the roots, and the flat iron should be positioned directly above it. In order to straighten your locks, first pass the plates through your hair while combing it gently. Then, comb through your hair again. Continue doing so until you have smooth tresses.
9. Spritz On Some Hairspray
Before you straighten each section, spray the roots with a spray that adds volume to make the hair look fuller. When you are finished, give your hair a polished appearance by applying a tiny amount of hair serum (which works best on thick, coarse hair) or hair spray (which works best on regular, thin hair). Also, keep in mind that applying an excessive amount of leave-in hair products will cause your hair to become greasy and weigh it down.
A keratin hair straightening treatment is something you can get if you don’t want to try to straighten your curly hair at home and are seeking a solution that will last for a longer period of time. Using a heat-straightening flat iron curls with a keratin complex to make hair stronger is another way to protect hair from heat damage. To get the greatest amount of smoothness and reduce the amount of frizz, be sure to coat each strand well.
10. Give your straight strands some finishing touches.
Examine your newly-straightened hair in the mirror to ensure that it looks its best. Have you overlooked any areas? You may need to repeat the process of running obstinate strands through your straightener several times before you are satisfied with the results. Then, finish off your new look with a smoothing cream that will both moisturize your hair and keep it from getting frizzy.
Avoiding Common Errors When Straightening Your Hair
If you have tried to straighten your hair but the results aren’t as smooth and shiny as you had hoped, the following are some of the most common hair straightening mistakes, as well as how to correct them.
Your locks were not sufficiently dry. Before you even start to straighten your hair, make sure that every strand is totally dry. Not only will you risk damaging your hair if you attempt to straighten it when it is wet, but you won’t get very good results either.
The hair straightener was not adjusted to the appropriate temperature. It’s likely that you’ll need to set the temperature of your straightening iron between 350 and 400 degrees if you have thick, coarse, or curly hair. Start with the lowest heat setting possible to avoid burning your hair, and then turn up the heat as needed to get the results you want.
You used and abused an excessive amount of styling products. Using styling products is an important part of getting the look you want, but using too many of them can make you look and feel heavy. You should make it a priority to use only the items that were described above to moisturize your strands and protect them from heat.
You made the mistake of trying to straighten too many huge parts. When trying to straighten coarse, curly hair, it is recommended to work in very small, inch-long portions. You will be able to straighten more quickly and successfully with the help of smaller parts because they are easier to control.
Additional Advice on Straightening Hair for Those with Curly Hair
If you just straightened your hair, you shouldn’t put it up right away. Don’t risk placing a kink in your lovely, smooth style! When using hair elastics, straightened hair that hasn’t been straightened for at least two or three days is much more likely to get kinks and bends than hair that has been straightened recently.
To heal harm, one must condition at a deep level. The use of heat styling tools on naturally curly hair might cause it to become much drier than it already is. A hair mask used once a week can help restore moisture and turn dry, brittle hair into healthier, shiny hair.
Take care of the dry ends. Frizz may be instantly tamed with smoothing hair oil, which also nourishes dry ends. Straightened hair can be brought back to life with dry oil, making it appear as silky and shiny as it did on day one.
Get regular trims. Split ends and frizzy hair could be caused by over-straightening or too much time in the heat. It is important to have frequent trims if you have curly hair in order to get rid of any dry ends and keep your hair looking healthy.
Sleep on silk. While you are sleeping, your hair suffers some of the most severe damage of the day. Frizz is caused by friction, which can be caused by rough cotton pillows, which might cause you to wake up with some crazy bedhead. Make the switch from a pillowcase made of cotton to one made of silk to minimize friction and control frizz.
Disclaimer:
The author’s views are his or her own. The facts and opinions in the article have been taken from various articles and commentaries available in the online media and Eastside Writers does not take any responsibility or obligation for them.
Note: Contact our Writers at www.eastsidewriters.com for writing Blogs/Articles on any niche. We have experts in various domains from Technology to Finance and from Spirituality to Lifestyle and Entertainment.